
Photo by Wendy Hurst
Fairy wings may not be the most practical of projects, but they're a lot of fun. Perfect for dress up, or an easy homemade halloween costume, these fairy wings are inexpensive to make and totally worth it.Step 1. Gather your materials. For this project you will need:
- Five wire hangers, or four wire hangers and some extra scrap wire
- Two pairs of nylon knee high stockings
- Thread
- Duct tape
- Paint, brushes, glitter and glue (not pictured)


Step 3. Once you have four of your hangers unbent into wing blanks, bend your last piece of wire into a closed off U shape, this will be the frame you attach your wings to.

Step 4. Tape the frame in place, and cover any sharp edges with duct tape.

Step 5. Shape your wings. I like to stick with simpler shapes, because it can be quite difficult to make elaborate shapes look symmetrical on both sets of wings. If your wire hangers have a coating its better to shape them with your hands, pliers can chip the coating and leave sharp edges for the stockings to snag on later.

Step 6. Consider how you want to attach the wings to your frame, and bend the stems so that attaching them will be easier later on.

Step 7. Cover your work surface, things are going to get messy.

Step 8. Stretch the nylon stockings over your wing shapes, try to align the toe seam of the stocking with wire so that it is less noticeable. Then, secure the stockings in place by wrapping the wire and stocking tightly with thread at the stem of the wing, and trim off the excess stocking.


Step 11. Paint your wings. This is the most time consuming and difficult to explain part of the process. You can try a few ideas on paper first, or you can just wing it. I like to start by painting along the edges to cover the wire, and then I move on to the outlines of the design.

When filling in the outlined sections of the wings with color I like to sheer out the paint with a lot of water, so that the stockings keep some of their translucency. Using thicker paint will make your wings more opaque.

Step 12. You can also add some sparkle to your wings by mixing glitter into craft glue to make custom colored glitter paint, and painting the mixture onto your wings. I prefer this method because the glue prevents the glitter from getting everywhere while you're painting, and the wings will not shed glitter all over the place later on.

Unfortunately, my camera phone could not capture the true sparklyness.
Step 13. Attach your wings to the frame. I used a combination of twisting wires and a generous application of duct tape to attach my wings to the frame.
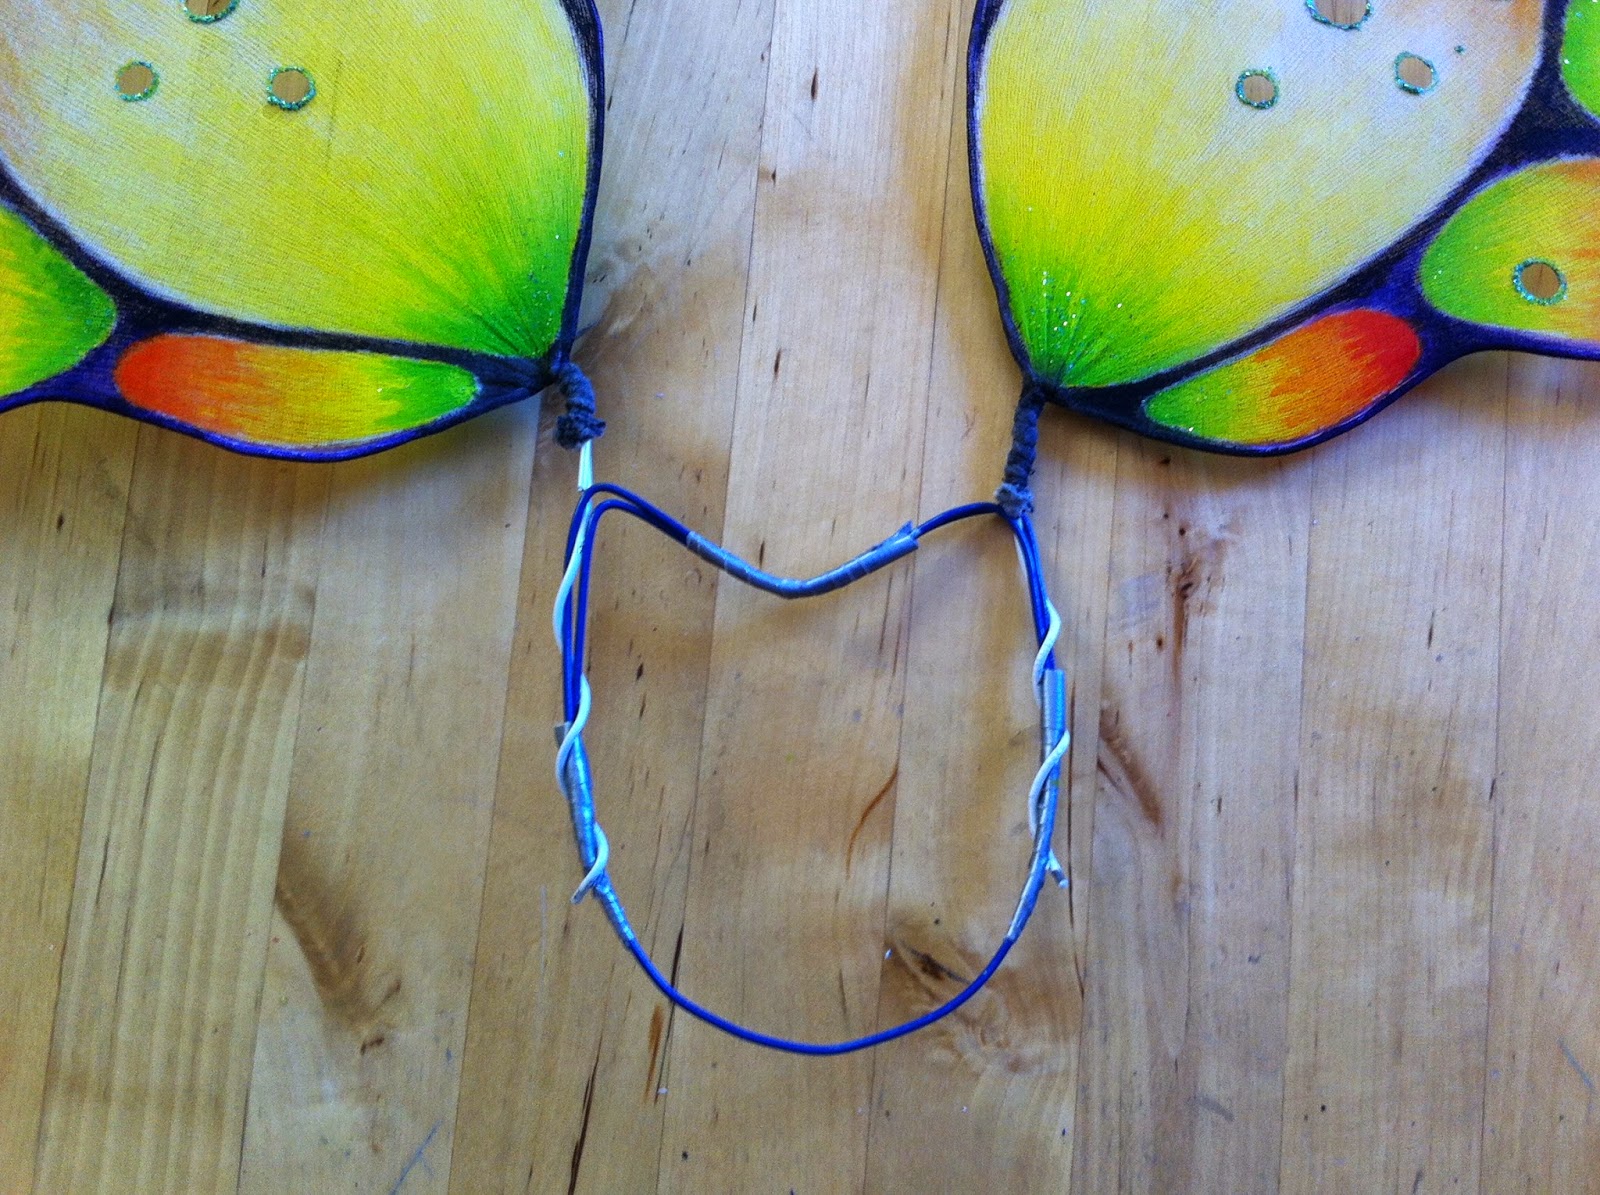
twisting,

and taping.

I switched to black duct tape so the frame would match the wings slightly better.
Continue taping until the wings feel secure, and then tape some more. These wings will be banging against door frames, house plants, and passers by, so don't skimp on the duct tape.
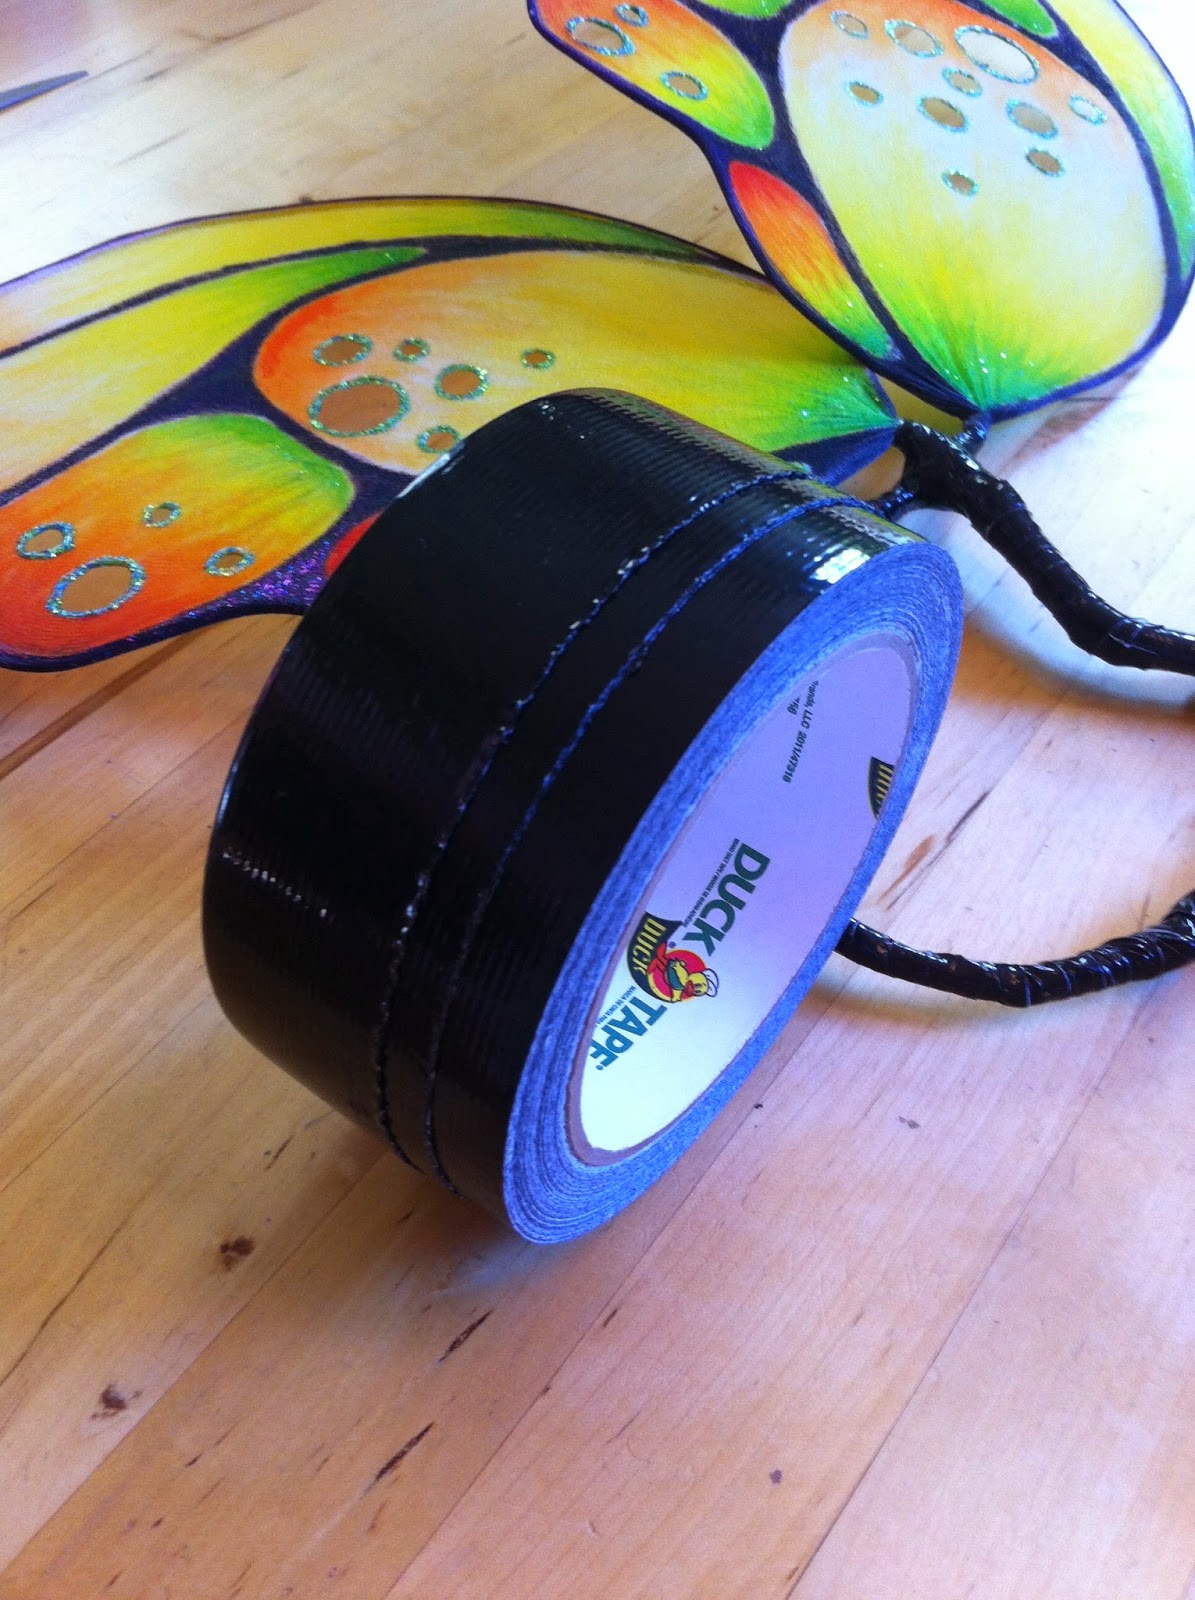
Quick Tip: You can make the duct tape much easier to work with by cutting it into thinner more manageable stripes, perfect for going around tight corners.

Congratulations! You're done. Of course there are more exciting embellishments you could add including, but not limited to rhinestones, beads, ribbon, fabric flowers, and Electroluminescent wire. However, for this example I wanted to show what you can create with just some very basic supplies. You could also add elastic, or ribbon straps to mount the wings on your shoulders. I prefer to wear my wings without straps by simply tucking the U shaped frame under tight fitting bodice or corset.

Special thanks to Wendy Shoots It for portrait photography


