Friday, June 30, 2017

Spiked Crown

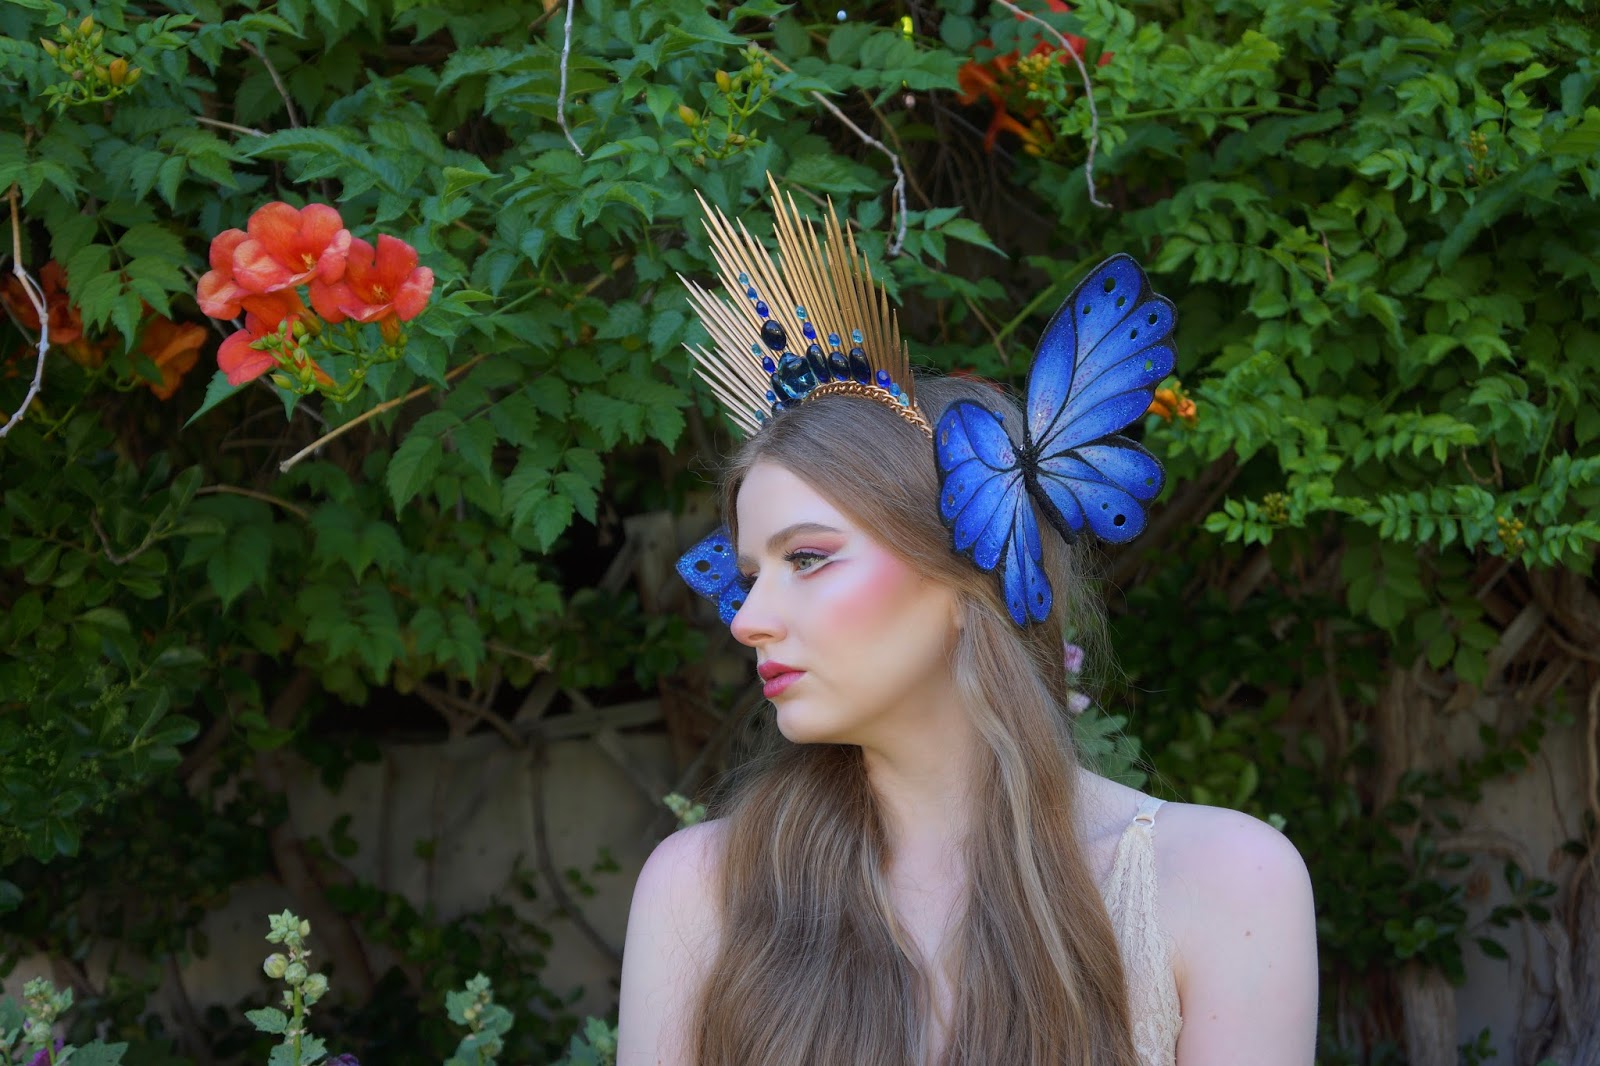
I was very inspired by the headdresses made by @hysteriamachine on instagram, and Angela Clayton's Spiked Halo Tutorial. I'm not 100% happy with the way mine turned out, the glass made it a little heavy, and the shape didn't turn out quite the way I hoped, but it was a fairly straight forward project. If you like the look, I highly recommend giving it a try, the most expensive part was the spray paint at $3.99, everything else was either free, or something I already had. 
The yarn didn't take the paint quite as well as I hoped, but I kind of expected that, luckily my hair covers most of it. I am kind of disappointed in the way that the crown looks with the butterflies, it just seems to be one of those cases where something looks much better in my head then it does on my head.

Thursday, June 15, 2017

Giant Butterfly Clips

I've made fairy wings before, using four wire hangers for large sets or two for small sets, and I was curious to see what I could make with just one hanger. 
The finished butterfly is a bit too small to wear as wings, but it's still cute and I think this experiment turned out alright. 

Wednesday, February 15, 2017

Making an Ugly Christmas Hat

...or tacky? or maybe you think it's cute, I think what's ugly is just as subjective as what's considered pretty.
It seems like there's been a ongoing trend of Ugly Christmas Sweaters for the past few years, and I thought this year (ahem...last year, this post is coming out a little late) I'd participate in the festivities. I thought maybe if I make my hat festive enough it'd make it harder to see how much the holiday season kills me inside. Unfortunately, I have neither the skill nor the patience (not to mention the yarn) to make a full sweater, so I decided to make a hat instead.
I've made hats on looms before, because fun fact I still don't know how to knit. In past projects I've used two strands of worsted weight yarn as a substitute for bulky weight yarn, the kind recommended for a large gauge loom.
This time I tried something a little different, I used a single strand and did three rows of wrapping instead of two. I got the idea from this video.    
After three rows of wrapping, I used my hook to pull my lowest loops over the top two.
I did 30 rows of knitting like this to create the brim of my hat.
After finishing my brim I switched colors and did 15 rows of burgundy, I alternated colors every 15 rows to create stripes.
After the completing the brim and two stripes, or 60 rows of knitting, I switched from knitting in the round to knitting a flat panel.  
Every 3 rows I reduced the number of pegs I used by 2, one on each side. In hindsight I think I should have reduced every 5 rows instead for a longer more gradually tapered shape of the hat, but in my defense I really had no clue what I was doing.


And here's what winging it looks like! Laying flat it's kind of an odd shape, especially from the side, but once I stitched the back closed it started looking a little bit more like what I was going for...aside from a weird lump in the back.  
You could stop here. Maybe add a pom-pom, and have a pretty cute hat, but I didn't set out to make a "cute" hat. I'm making an Ugly Christmas Sweater...-hat, so I need decorations, and lots of 'em!      
I started with some mossy green yarn I had left over from another project and Boye spool loom (mini review of the Boye looms at the end of the post) I didn't exactly measure how much cording I made, I basically just knit till I ran out of the green yarn I had, but if I had to guess I'd say it was around a yard and a half...ish?  
Next, I made a few flowers following this incredibly helpful video tutorial.
I made three sizes. From the bottom to top: flower loom-10 rows per petal, large cord-7 rows per petal,  small cord 4 rows per petal.
Lastly, I just sewed on my decorations. There wasn't a lot of rhyme or reason to my placement I just knew I kind of wanted my "vine" to spiral up the hat kind of like a tinsel garland on a tree, and the flowers to hang off it like ornaments. My "vine" ended up being a little long so I added in a couple loop de loops to use up the extra length. 
One important tip: be careful not to sew the cord around the hat too tight, or you might loose some of the stretch in your hat. 

My thoughts on the Boye Looms:

I really can't recommend these looms to anyone. The peg design is awful, it's got this hook element that's meant to prevent your yarn from accidentally slipping off, but it's such a pain trying to get your loops off that if you're impatient with it, you can end up shredding your yarn. The pegs are also kind of flexy and flimsy feeling. The Boye looms are just really poorly designed, very frustrating to work with, don't waste your time or your money on them.  
Overall I think the hat turned out okay, very cozy. On another note, I got glasses! I never realized how poor my vision was until I could actually see. Now that I can, part of me prefers the way I saw things before. Ignorance can be bliss sometimes.

Thursday, September 15, 2016

Midnight Eyes Fairy Wings

Another pair of fairy wings? Yup.
For those of you looking for more detailed instructions on how to make wings like these, I wrote a tutorial a while back, and I also have a couple other pairs on the blog: mini wings, and dreamcatcher wings...I got a lotta wings.    
As usual my wings begin with wire hangers, and two pairs of the cheapest knee high nylon stockings you can find. I like the ones that come in the little plastic capsules, I can usually find them for around $0.99 at the drugstore.  
Usually, I prefer to work on white stockings because its much easier to get colors to show up vividly on a lighter colored canvas vs. a darker one, but recently its been rather hard to find white stockings at my local store. I opted for black because it seemed better then other options: brown or band-aid tan. 
I was originally inspired by the patterns on butterfly wings that mimic owls eyes in order to scare off potential predators. My design turned out a bit more literal, but who doesn't love a giant pair of unnerving blue eyes? (I am reminded of Dr. T. J. Eckleburg) 
However, before committing to the design with paint, I decided to cut out some paper templates and test a few sizes to see what looked proportional. 
The next challenge was trying to figure out how to tie in the eyes with the rest of the design. Swoopy lines...admittedly, I didn't really have much of a plan to begin with for these wings. A fact which became painfully clear when I tried (and failed) to get this design perfectly symmetrical on both wings.  
Getting cheap white paint to appear opaque on what is essentially super stretchy black netting (because stockings are so sheer) is a bit of a nightmare. Trying to get clean flowing lines...impossible. Regardless of the futility, I kept painting in thin layers until they looked decent from a distance/I wanted to burn the damned things.
Frustration aside, it was necessary to paint the design in white first if I wanted the colors I painted next to actually show up, but I don't think I'll be using dark stocking for wings again any time soon.
Unfortunately, all of the lovely pastel colors I mixed up and painted on the wings refuse to show up nicely on camera...well darn.  
At this point things were getting a bit tedious, and I really wasn't satisfied for how the wings were shaping up. (Should I mention I paint both sides of my wings? So that the design is visible from the front and back...I went through all this nonsense twice) 
And here you can see how rough the edges of my lines were, despite my best efforts. 
I thought some gems might liven things up. I was wrong.

Perhaps a hint of gold glitter will add a little dazzle? Meh.
They're pretty...I guess, but for how much time and fussing these wings took, the finished product is just a little lack-luster to me. They were tedious to make, don't look nearly as nice in photographs as they do in person, and there's just something lacking that I can't quite put my finger on.

Monday, June 20, 2016

Penguins for Sonja

For as long as I can remember my grandmother has always loved penguins, she had penguins on her checkbook, calendar, and a painting of them hanging in her hallway. Last Mother's Day when she saw the earrings I made for my mother, she requested I make her a pair as well. Naturally, I thought penguins would be the right design for her.
Instead of repeating the same design on both earrings, I decided to doodle a whole family of penguins. I'm so used to working with a lot of colors (I can't help it, I like rainbows) it was interesting working with a more limited color pallet. Overall, I like them, even if they don't perfectly match, they look like they belong together.
Hopefully, my grandmother likes them too.

Sunday, May 8, 2016

Mother's Day Earrings

My mother is an exceptionally difficult woman to find gifts for, then again I was an exceptionally difficult child to raise (still am). So I suppose stressing over what to buy or make her every time the occasion arises is fair payback (at least for the times I turned my nose up at roast beets and asparagus...ick) Well, its a start.
I decided to make a pair of earrings, and since shrink plastic is quite light I thought it would make an ideal material. I started with purple, one of her favorite colors, and quickly realized I had made a mistake. Instead of tracing my little birdies so that they were mirrored, one tweeting to the left one tweeting to the right...I had just turned the design 180 degrees.
I decided to forge ahead, regardless of my mistake and color the birds in. I tried to keep the color scheme very cool-toned and purple-centric overall, with a pop of yellow here and there for contrast.  
Here is how I would have liked my birds to turn out. I love symmetry! However, because shrink plastic has a rough side and a shiny side I couldn't just flip the design over. Well, I suppose I could, but the discrepancy in texture would have bugged the heck outta me.
Have I mentioned how much I love shrinking stuff?  :)
I had to find the perfect hardware for my mother’s earrings because she can be remarkably picky: they can't be too heavy, they have to stay in during all manner of activities from skiing to windsurfing, and they cannot under any circumstances be studs. After a bit of searching I found some lightweight silver earring fastenings that latched in the back.      
Finished! Fingers crossed she actually likes them.

Amethyst Fairy Ensemble