Showing posts with label Experiments. Show all posts
Showing posts with label Experiments. Show all posts
Tuesday, July 30, 2019
Saturday, July 20, 2019
Poison Ivy / Woodland Nymph / Whatever T-Shirt Reconstruction
I don’t know what happened with the video quality, but I think the dress turned out okay. Hopefully, things are clear enough despite the less than ideal resolution. If you watch it on your phone it probably doesn't make much of a difference so there's that silver lining?
Making videos is hard, sewing is hard, and I feel like I have no idea what I’m doing, but dang it I’m tryin’ anyway! That’s gotta count for something, right?
Saturday, September 1, 2018
Wednesday, December 20, 2017
How to transform old T-shirts into a nightgown
For those of you who might be curious about how my wilted lettuce nightgown was received, she doesn’t seem to totally hate it...not sure if that’s just a front to spare my feelings though.
Saturday, August 5, 2017
Criss Cross Body Chain
I decided I wanted to try leaving my house (for once...I don't get out a lot) to try and get a slightly more interesting backdrop. There's a parking lot relatively near with all kinds of neat textures, crumbling concrete, plants, fences, etc. Just to try something new, you know? Anywho, I put on my makeup, my outfit, grab my camera, tripod, and head off into the big wide world.
I'm setting up to shoot in a parking lot so I'm extra EXTRA aware of my surroundings, being sure to stay out of the way of any potential incoming or outgoing traffic. I hear a car's engine start, so I move myself and my camera to a place where I know there is no way I could be in the way. So I'm focusing on setting up a new shot, framing things, fiddling with my camera, all that nonsense. I no longer hear the car so I assume whoever was in it is long gone, doing whatever they set out to do. Turns out I was wrong. The guy driving the car apparently started his car, pulled out, saw me, then parked again, and was now walking in my direction...Super, I just love it when random strangers approach me while I'm in the middle of trying to do something.
I notice him, and say "Can I help you?" the most Canadian way of saying "What the hell do you want from me? Please go away." I'm polite, but I make no effort at being friendly or conversational. Apparently this is too subtle. He starts talking at me (not to me, that would imply I'm a willing participant in this conversation), and I do my upmost to make it clear that I'm in the middle of something and even if I did want converse with a complete stranger, now is NOT A GREAT TIME. Again, I guess I was too subtle.
I'm no expert photographer, videographer...whatever, but I do know that good lighting is absolutely key to getting a decent image, and this guy was wasting good daylight.
I get that I'm in a public space. I understand that I'm wearing somewhat over the top makeup and fashion. I'm a random girl with a camera, doing something slightly out of the ordinary. I get why someone might want to come over and investigate the situation. I have nothing against curiosity, but that didn't seem to be this person's driving force. The only curiosity he seemed to have was for my phone number, and seeing as he hadn't made the finest first impression (wasting time & good light) I wasn't super inclined to give it to him. In the end, he wouldn't leave till he gave me his business card.
Overall the interaction was uncomfortable, it left me anxious and annoyed. In the end, I decided to give up on shooting outside, and retreated back home. That negativity stuck with my for a while, and I really wasn't happy with any of the shots I got.
I'm an anxious person. I'm wary of strangers. That said, I don't want to let this interaction reinforce my anxieties, or villainies this random stranger. I simply wish that this stranger had been a bit more observant, aware of the situation, or the signals I was clearly (in my opinion) giving off: I'm busy, you're making me uncomfortable, please just move along. Maybe it's on me, maybe I should be more direct, more assertive, but that doesn't come easily, and honestly, there's a part of me that's scared that any perceived rudeness might will be met with violence.
I just wish things had gone differently.
End of rant, sorry about that.
Tuesday, July 25, 2017
How to Ruin a Perfectly Good Duvet Cover and Make an Impractical Dress
This project wasn't quite as straight forward as I hoped it would be. After the first failed bodice I wasn't terribly diligent about filming the process of making it. So this is less of an instructional video, and more of a "join me on a stupid sewing misadventure" type video, but I still think it has some educational value...maybe...sort of ~shrugs~
Despite the fit being a bit off, the dye job a bit shoddy, and the fabric less than ideal, I do think I did a rather neat job on some of the finishing: hemming, binding, etc. So not a total loss.
Sidney Eileen's drafting tutorial
On another note: I tried talking to the camera. It was very awkward, hopefully I can learn to be slightly less awkward in the future. No promises.
Despite the fit being a bit off, the dye job a bit shoddy, and the fabric less than ideal, I do think I did a rather neat job on some of the finishing: hemming, binding, etc. So not a total loss.
On another note: I tried talking to the camera. It was very awkward, hopefully I can learn to be slightly less awkward in the future. No promises.
Friday, June 30, 2017
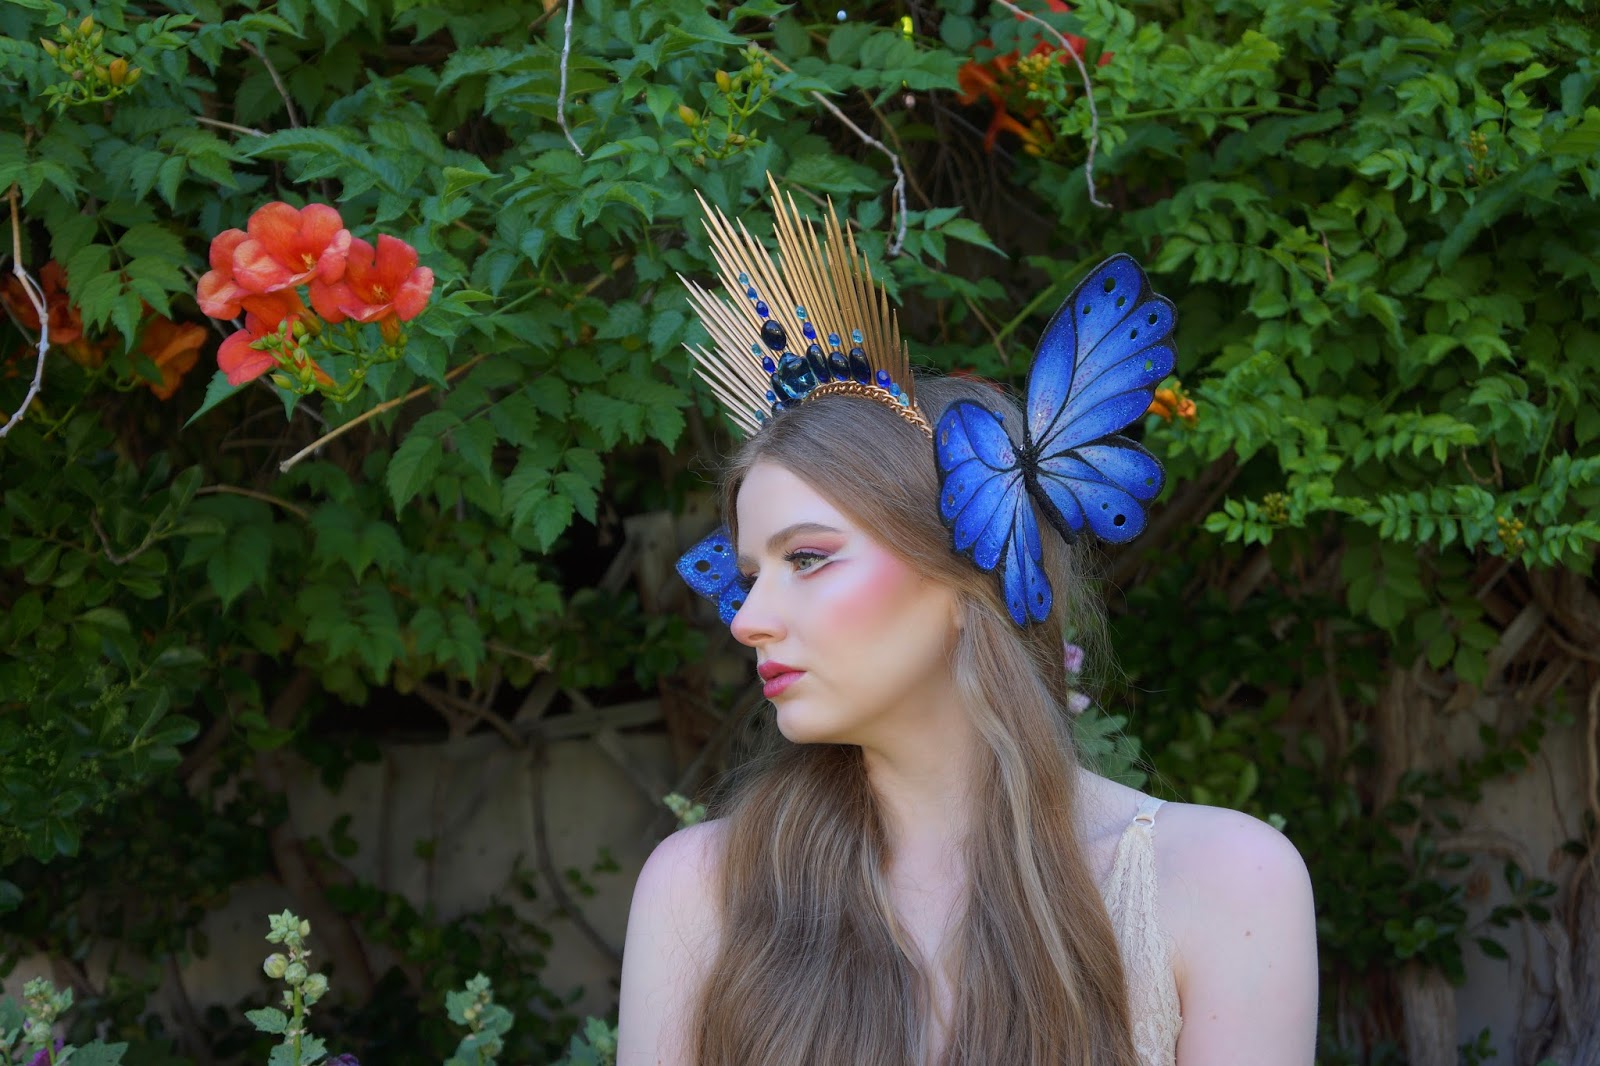
Spiked Crown

I was very inspired by the headdresses made by @hysteriamachine on instagram, and Angela Clayton's Spiked Halo Tutorial. I'm not 100% happy with the way mine turned out, the glass made it a little heavy, and the shape didn't turn out quite the way I hoped, but it was a fairly straight forward project. If you like the look, I highly recommend giving it a try, the most expensive part was the spray paint at $3.99, everything else was either free, or something I already had.
The yarn didn't take the paint quite as well as I hoped, but I kind of expected that, luckily my hair covers most of it. I am kind of disappointed in the way that the crown looks with the butterflies, it just seems to be one of those cases where something looks much better in my head then it does on my head.
Thursday, June 15, 2017
Giant Butterfly Clips


Wednesday, March 16, 2016
Experiments: Dreamcatcher Wings

I've written a bit about my annual attempt at learning how to knit (yes, I know loom knitting doesn't really count, but at least I'm making an effort) anyhoo, as a symptom of this unfortunate habit I've developed a bit of a yarn problem. I'd hardly say its out of control, but I do have far more cheap acrylic "practice" yarn than any one person needs. So, in a long standing tradition of using materials as they were never intended I thought I'd play around with my yarn stash and try something new. My original idea was pretty simple: dreamcatcher fairy wings. The only problem, I've never actually made a dreamcatcher before...

I began with two wire hangers.


I felt like the frame needed a little something extra so I wrapped the top edge of the wings again, this time adding a glow in the dark bead every inch or so.

Dream catchers are usually circular which means there is an equal distribution of tension along the perimeter, because my wings were more marquise shaped I was worried the uneven tension might warp the flexible wire frame out of shape...which it did, a little bit. I think if I were to remake these wings in a larger size I'd need to use a much stronger wire for the frame.


Overall, I think this little experiment was a success, if I were to make them again I think I’d use something like embroidery floss for the weaving, and some stiffer wire for the frame. These wings feel a bit more fragile than other pairs I’ve made using stockings, but I really like the delicate shadows these wings cast when I wear them.
Friday, January 30, 2015
Shrink Plastic Adventures
Not long ago I was going through some of my craft supplies, attempting to organize them, attempting being a key word here. While I was rummaging through some old beading knick knacks I found some vaguely familiar plastic sheeting, I didn't entirely remember what it was until a month or so later. Shrink plastic! I remembered playing with the stuff years ago, admittedly I got a bit nostalgic...then I remembered why I hadn't touched it in years: drawing...not exactly a forte of mine. Still, I've been a bit burnt out on failed sewing projects, so I thought I'd give it a shot. The results, I'm proud to say where not too appalling.

Not overly appalling, but perhaps a bit tacky :)
The real charm of shrink plastic is, if you make a few mistakes, (as I inevitably do) you can have the satisfaction of watching those mistakes curl up and shrink into obscurity, then pretend they don't exist. It's delightful.
There are a few basic varieties of shrink plastic: clear, white, sanded or smooth. The sanded or frosted shrink plastic is best suited to colored pencils because the texture gives the pencils something to grip onto, and the finished pieces will be matte. The smooth or glossy plastic works best with markers and alcohol inks. The main difference between the clear and white shrink plastic, is that the white plastic is opaque, and the design can only be seen on one side, versus the clear plastic where you can see the design clearly on both sides. You can even achieve a lovely stained glass appearance when working with the clear glossy plastic. (an effect, I can't really demonstrate because I only have the frosted variety)

- Shrink plastic
- Hole punch
- Scissors
- Colored pencils
- Oven
- Baking paper
- Needle nose pliers
- Chain
- Clasp
- (Optional) Clear top coat or glaze

Step 1. Draw whatever you like on the shrink plastic. If drawing isn't your forte you can sketch a few ideas on paper first, or look for images in coloring books and trace the ones you like best. I chose to use colored pencils on mine because it was what I had on hand but you can use all sorts of things to draw on your shrink plastic: permanent markers, stamps, alcohol inks, or Copic markers.

I drew a few simple gems and traced a swallowtail butterfly from a coloring book.
Step 2. Color in your designs. Keep in mind that the colors will become more intense when you shrink your images.

I may have been a bit overzealous with the rainbow...in my defense, its been rather gray this january.
Step 3. Carefully cut out your images, rounding any sharp corners, and punch any necessary holes.

Step 4. Prepare to shrink your designs! My shrink plastic's instructions said to place the pieces colored side up on a baking paper lined sheet pan in a 325 degree F (or 163 C) oven, but your instructions may differ, so make sure to read them. Shrinking your charms is by far the most nerve wracking/exciting part of the process.


First the plastic will curl. If it looks like it might be stuck to itself pull it out of the oven and carefully unstick the warm piece. You must do this while the plastic is warm and flexible, if it gets too cold it will become brittle and snap.

If you like, you can seal your designs. (However, I would not recommend the spray I used-Kylon Acrylic Crystal Clear, it did not work very well and the pieces stunk for quite a while even after they had completely dried.)
Step 5. You can really use these charms for anything you can think of.
I chose to make a couple necklaces. Unfortunately, I didn't have any jump rings that matched my chain, instead I simply opened up the last link of my chain and used that to attach the charm to the necklace.


Lastly, a clasp, which luckily came with the chain I was using so I didn't have to go out and find one.


Subscribe to:
Comments (Atom)

-
 Photo by Wendy Hurst Fairy wings may not be the most practical of projects, but they're a lot of fun. Perfect for dress up, or a...
 -
 Not long ago I was going through some of my craft supplies, attempting to organize them, attempting being a key word here. While I was rum...
