Wednesday, March 16, 2016

Experiments: Dreamcatcher Wings

I've written a bit about my annual attempt at learning how to knit (yes, I know loom knitting doesn't really count, but at least I'm making an effort) anyhoo, as a symptom of this unfortunate habit I've developed a bit of a yarn problem. I'd hardly say its out of control, but I do have far more cheap acrylic "practice" yarn than any one person needs. So, in a long standing tradition of using materials as they were never intended I thought I'd play around with my yarn stash and try something new. My original idea was pretty simple: dreamcatcher fairy wings. The only problem, I've never actually made a dreamcatcher before...     
I began with two wire hangers.
I kept the wing shape very simple, because I wasn't sure how the dreamcatcher pattern would translate on an irregular frame shape, and I was worried the wobbly edges of a more natural wing shape might distort the dreamcatcher pattern.
I wrapped the frame with yarn.
To prevent the yarn from unraveling I brushed a few inches of the frame with glue then wrapped the yarn. A binder clip came in handy to hold the end in place if I needed to set the project down for a moment.
I felt like the frame needed a little something extra so I wrapped the top edge of the wings again, this time adding a glow in the dark bead every inch or so.  
Dream catchers are usually circular which means there is an equal distribution of tension along the perimeter, because my wings were more marquise shaped I was worried the uneven tension might warp the flexible wire frame out of shape...which it did, a little bit. I think if I were to remake these wings in a larger size I'd need to use a much stronger wire for the frame.   
Weaving the web of the dream catcher was the most time consuming part of the wings. I blame the yarn that I was using (and my complete lack of experience), because it was so stretchy I needed to keep it under constant tension or my weaving pattern would go all loopy and not look as nice. The wrapping and weaving process was also a lot more repetitive than painting some of my other wings, so the whole process seemed to take much longer.
Overall, I think this little experiment was a success, if I were to make them again I think I’d use something like embroidery floss for the weaving, and some stiffer wire for the frame. These wings feel a bit more fragile than other pairs I’ve made using stockings, but I really like the delicate shadows these wings cast when I wear them. 

Tuesday, January 5, 2016

T-Shirt Nightgown

My mother asked me to modify a T-shirt to make it a bit longer so she could wear it as a nightgown. I asked if I could take a little bit of creative liberty, and she said sure. I think the finished nightgown is relatively cute, and I was able to throw it together in a snap. (Well, a snap compared to some other projects).      
I didn't take many pictures while was working, because the dreary winter lighting was wreaking havoc on my phone's camera, and I wasn't sure if this little project was exciting enough to document, so I'll try and keep it short. 
This is the shirt I started with.
I dug through my scrap fabric and was able to find an old paint shirt in a complementary shade. It was in pretty bad shape, with lot of wear and tear around the back and shoulders and more than a few paint stains, but there was enough usable fabric to make the accents I wanted.      
I sketched out my basic plan.  
I kept the body of the dress very simple, because it’s meant to be loosefitting and I wanted to preserve the cute manatee design.
I sewed together the strips I cut from the other shirt to form a long strip.
I did a lettuce hem on the long strip and the sleeve pieces I cut out to give the material some extra flounce.
Then gathered the top edge of the strip with a running stitch. 
I laid out all of the pieces, to see how it was coming together, and decided to use the hem I cut off of the original shirt inside out to create a tie for the back of the dress.    
I sewed on the neckline and sleeves first, centering the sleeves at the shoulder seam. Then I sewed from the end of the sleeve to the bottom of the dress securing the waist ties in the seam as I went. Lastly, I pinned and sewed the bottom ruffle to finish off the dress.      
Before and After
I had a little trouble with my serger on the neckline the first go-'round, so I had to redo it. I'm not entirely satisfied with the way the dress turned out, but overall I think it turned out pretty close to my original sketch, and my mom seemed happy enough with it. 

Friday, March 13, 2015

Saint Patrick's Day Mini Wings

I've already posted an easy step by step tutorial on how to make similar wire framed fairy wings, and you can find more detailed instructions in that post. I was just feeling rather festive, and decided to make a little pair of green and gold wings, and I thought I'd share a few pictures, enjoy.   
Instead of using four wire hangers, one for each wing like I did on my previous pair of wings, I formed these wings out of two hangers.
I was aiming for a swallowtail butterfly-ish shape, but I wasn't quite happy with it so I tried to add a bit of a scalloped edge, which helped.
Because the wings are quite small, I ended up using just one pair of knee high stockings, cutting them in half and knotting the ends to cover my wings.
I was a bit...overzealous with the incense stick while melting holes in my wings, which caused a few runs in the stockings. As a result, it looks like my wings have some sort of horrible flesh eating parasite eating away at them. Oops.
Since most paints don't show up particularly well on dark backgrounds, I painted my design in white first, so that the colors I painted in top would be more vivid.
Yikes, that yellow, a bit too vivid. Oh well.
I wish my camera phone could better capture the true sparklyness.
Then I added a bit of glitter....well..actually, quite a lot of glitter, theres no such thing as too much glitter, right?
I bent the remaining wire, from what used to be the hook of the hanger, into a U shape to create the frame. In hindsight I should have used some extra wire to make the frame a bit larger. The small frame does stay tucked into the back of a tightly fitted bodice, but it doesn't feel nearly as secure as a larger frame.
Here are the two sets of wings together for size comparison. As you can see the wings made from just two hangers are quite dinky compared to the full sized set. Still, I think they're rather cute.     

Friday, January 30, 2015

Shrink Plastic Adventures

Not long ago I was going through some of my craft supplies, attempting to organize them, attempting being a key word here. While I was rummaging through some old beading knick knacks I found some vaguely familiar plastic sheeting, I didn't entirely remember what it was until a month or so later. Shrink plastic! I remembered playing with the stuff years ago, admittedly I got a bit nostalgic...then I remembered why I hadn't touched it in years: drawing...not exactly a forte of mine. Still, I've been a bit burnt out on failed sewing projects, so I thought I'd give it a shot. The results, I'm proud to say where not too appalling.
Not overly appalling, but perhaps a bit tacky :) 
The real charm of shrink plastic is, if you make a few mistakes, (as I inevitably do) you can have the satisfaction of watching those mistakes curl up and shrink into obscurity, then pretend they don't exist. It's delightful. 
There are a few basic varieties of shrink plastic: clear, white, sanded or smooth. The sanded or frosted shrink plastic is best suited to colored pencils because the texture gives the pencils something to grip onto, and the finished pieces will be matte. The smooth or glossy plastic works best with markers and alcohol inks. The main difference between the clear and white shrink plastic, is that the white plastic is opaque, and the design can only be seen on one side, versus the clear plastic where you can see the design clearly on both sides. You can even achieve a lovely stained glass appearance when working with the clear glossy plastic. (an effect, I can't really demonstrate because I only have the frosted variety)
Now this isn't really much of a tutorial, more just an invitation to play with a new medium and experiment. I ended up making a few necklaces, if you'd like to make something similar you will need the following materials:
  • Shrink plastic
  • Hole punch
  • Scissors
  • Colored pencils 
  • Oven
  • Baking paper
  • Needle nose pliers
  • Chain 
  • Clasp
  • (Optional) Clear top coat or glaze 
Step 1. Draw whatever you like on the shrink plastic. If drawing isn't your forte you can sketch a few ideas on paper first, or look for images in coloring books and trace the ones you like best. I chose to use colored pencils on mine because it was what I had on hand but you can use all sorts of things to draw on your shrink plastic: permanent markers, stamps, alcohol inks, or Copic markers.      
I drew a few simple gems and traced a swallowtail butterfly from a coloring book. 
Step 2. Color in your designs. Keep in mind that the colors will become more intense when you shrink your images. 
I may have been a bit overzealous with the rainbow...in my defense, its been rather gray this january. 
Step 3. Carefully cut out your images, rounding any sharp corners, and punch any necessary holes. 
Step 4. Prepare to shrink your designs! My shrink plastic's instructions said to place the pieces colored side up on a baking paper lined sheet pan in a 325 degree F (or 163 C) oven, but your instructions may differ, so make sure to read them. Shrinking your charms is by far the most nerve wracking/exciting part of the process.     
First the plastic will curl. If it looks like it might be stuck to itself pull it out of the oven and carefully unstick the warm piece. You must do this while the plastic is warm and flexible, if it gets too cold it will become brittle and snap.  
If you like, you can seal your designs. (However, I would not recommend the spray I used-Kylon Acrylic Crystal Clear, it did not work very well and the pieces stunk for quite a while even after they had completely dried.)      

Step 5. You can really use these charms for anything you can think of. 
I chose to make a couple necklaces. Unfortunately, I didn't have any jump rings that matched my chain, instead I simply opened up the last link of my chain and used that to attach the charm to the necklace.
Lastly, a clasp, which luckily came with the chain I was using so I didn't have to go out and find one. 
Step 6. Enjoy your shrink plastic creations! 

Tuesday, October 7, 2014

How to Make: Easy Affordable Fairy Wings

Photo by Wendy Hurst
Fairy wings may not be the most practical of projects, but they're a lot of fun. Perfect for dress up, or an easy homemade halloween costume, these fairy wings are inexpensive to make and totally worth it.

Step 1. Gather your materials. For this project you will need:
  • Five wire hangers, or four wire hangers and some extra scrap wire 
  • Two pairs of nylon knee high stockings 
  • Thread 
  • Duct tape
  • Paint, brushes, glitter and glue (not pictured) 
Step 2. Unbend your wire hangers until the part you hang your clothes on is roughly circular, and straighten the hooked part. This will be your wing blank, its much easier to create a new shape in the wire when you don't have to fight against pre-existing kinks.
         
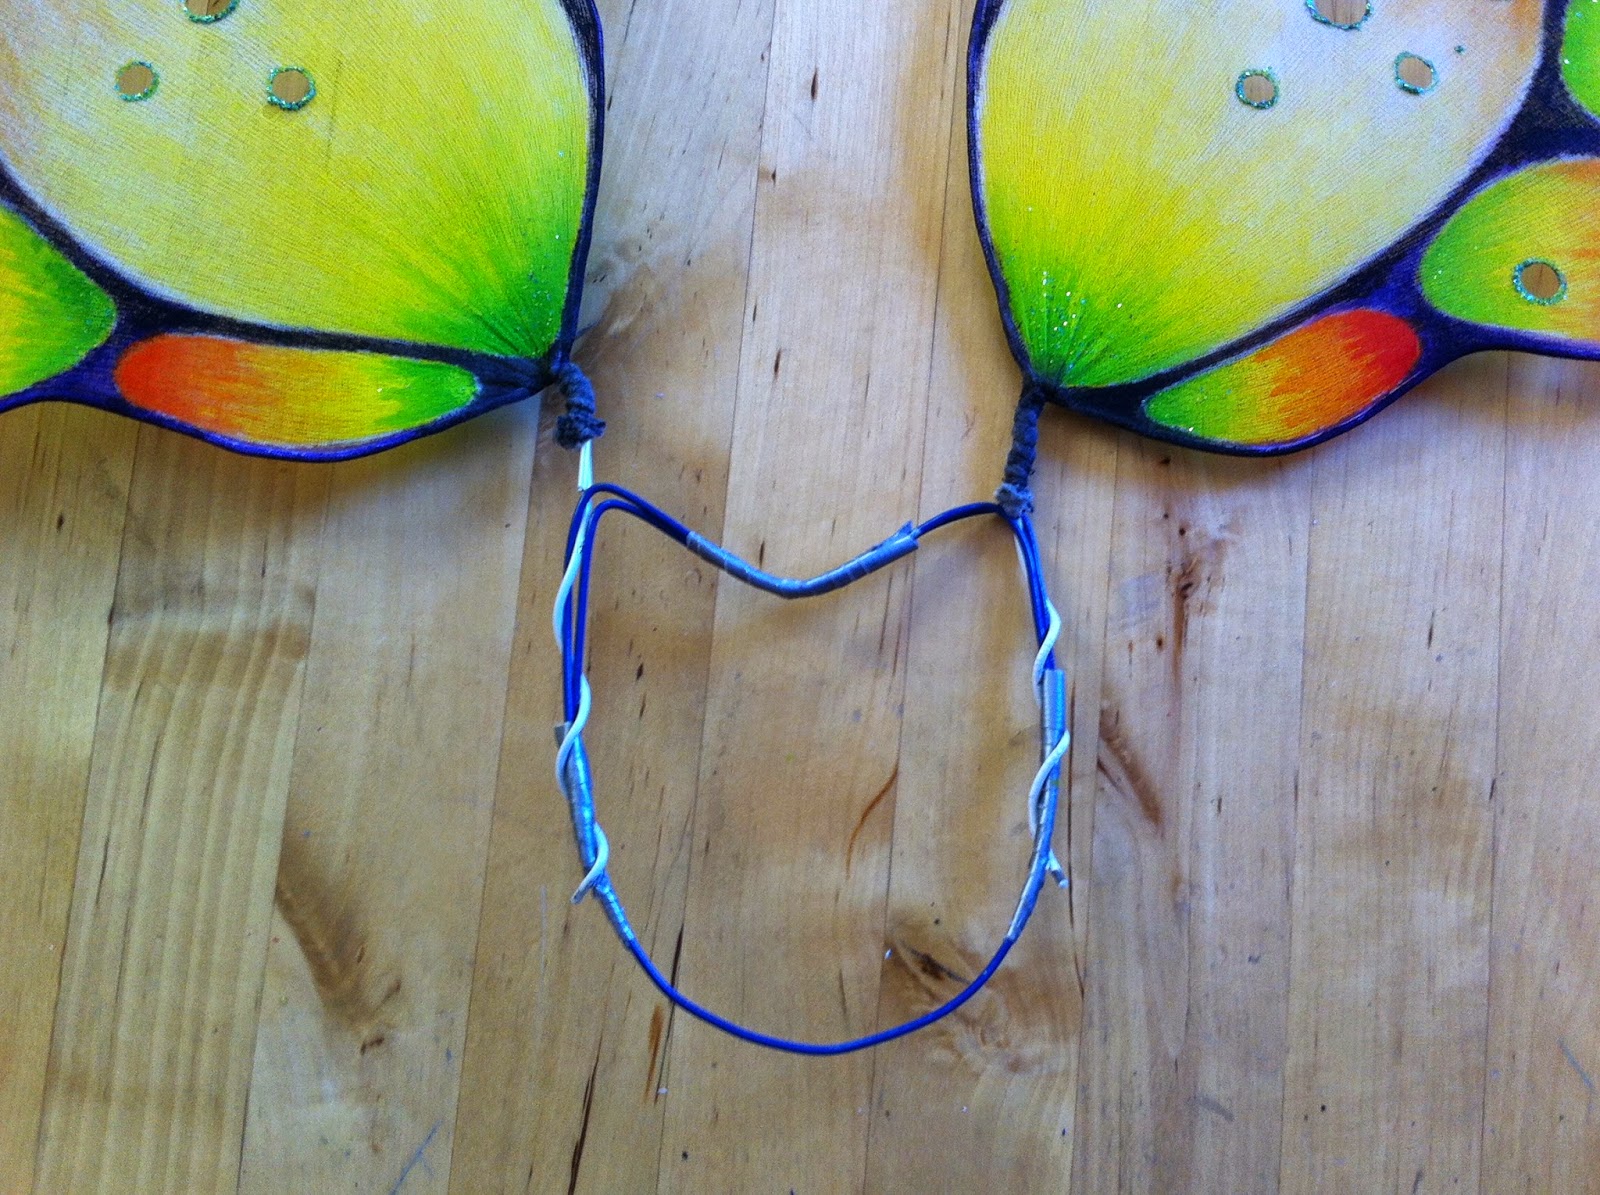
Step 3. Once you have four of your hangers unbent into wing blanks, bend your last piece of wire into a closed off U shape, this will be the frame you attach your wings to.
Step 4. Tape the frame in place, and cover any sharp edges with duct tape. 
Step 5. Shape your wings. I like to stick with simpler shapes, because it can be quite difficult to make elaborate shapes look symmetrical on both sets of wings. If your wire hangers have a coating its better to shape them with your hands, pliers can chip the coating and leave sharp edges for the stockings to snag on later. 
Step 6. Consider how you want to attach the wings to your frame, and bend the stems so that attaching them will be easier later on.
Step 7. Cover your work surface, things are going to get messy.
Step 8. Stretch the nylon stockings over your wing shapes, try to align the toe seam of the stocking with wire so that it is less noticeable. Then, secure the stockings in place by wrapping the wire and stocking tightly with thread at the stem of the wing, and trim off the excess stocking.
         
If there are areas where the stocking gapes away from the wire and creates this webbing effect, the stocking can be easily stitched to the wire. Don't worry about how the stitches look, they can be covered with paint later.    
         
Your stocking covered wings should look something like this.
Step 9. Lightly draw a design on your wings. Again, the hardest part of making these fairy wings is keeping everything looking symmetrical. It is a lot easier to mirror a simple design.
Step 10. If you like it, you can melt small holes into the nylon using a lit incense stick. However, these holes can be quite fragile, and can cause large runs in the stockings. I like to reinforce them with a little bit of watered down craft glue to prevent runs in the material.
Step 11. Paint your wings. This is the most time consuming and difficult to explain part of the process. You can try a few ideas on paper first, or you can just wing it. I like to start by painting along the edges to cover the wire, and then I move on to the outlines of the design.
When filling in the outlined sections of the wings with color I like to sheer out the paint with a lot of water, so that the stockings keep some of their translucency. Using thicker paint will make your wings more opaque.
Step 12. You can also add some sparkle to your wings by mixing glitter into craft glue to make custom colored glitter paint, and painting the mixture onto your wings. I prefer this method because the glue prevents the glitter from getting everywhere while you're painting, and the wings will not shed glitter all over the place later on.
Unfortunately, my camera phone could not capture the true sparklyness.   
Step 13. Attach your wings to the frame. I used a combination of twisting wires and a generous application of duct tape to attach my wings to the frame.
twisting,
and taping.
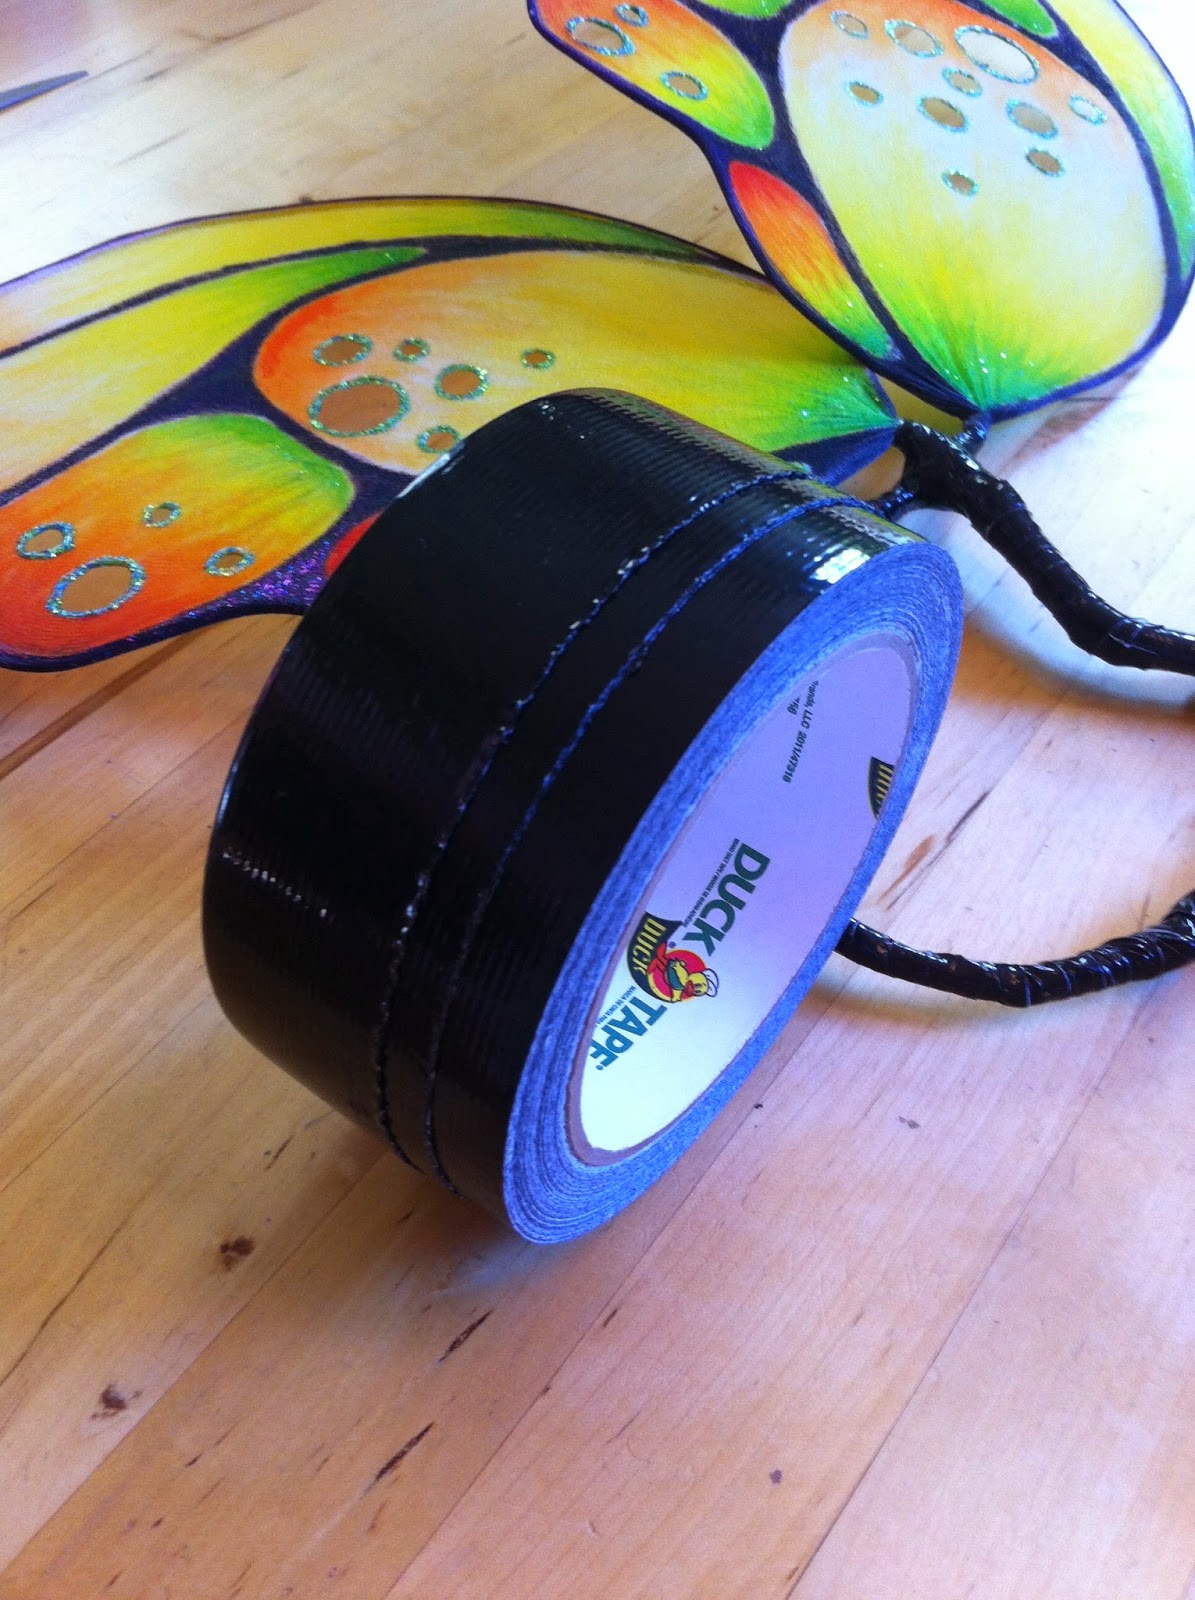
I switched to black duct tape so the frame would match the wings slightly better.
Continue taping until the wings feel secure, and then tape some more. These wings will be banging against door frames, house plants, and passers by, so don't skimp on the duct tape.
Quick Tip: You can make the duct tape much easier to work with by cutting it into thinner more manageable stripes, perfect for going around tight corners. 
Congratulations! You're done. Of course there are more exciting embellishments you could add including, but not limited to rhinestones, beads, ribbon, fabric flowers, and Electroluminescent wire. However, for this example I wanted to show what you can create with just some very basic supplies. You could also add elastic, or ribbon straps to mount the wings on your shoulders. I prefer to wear my wings without straps by simply tucking the U shaped frame under tight fitting bodice or corset.
Special thanks to Wendy Shoots It for portrait photography

Amethyst Fairy Ensemble